Virtual tables (also known as virtual entities) enable the integration of data residing in external systems by seamlessly representing that data as tables in Microsoft Dataverse, without replication of data and often without custom coding.
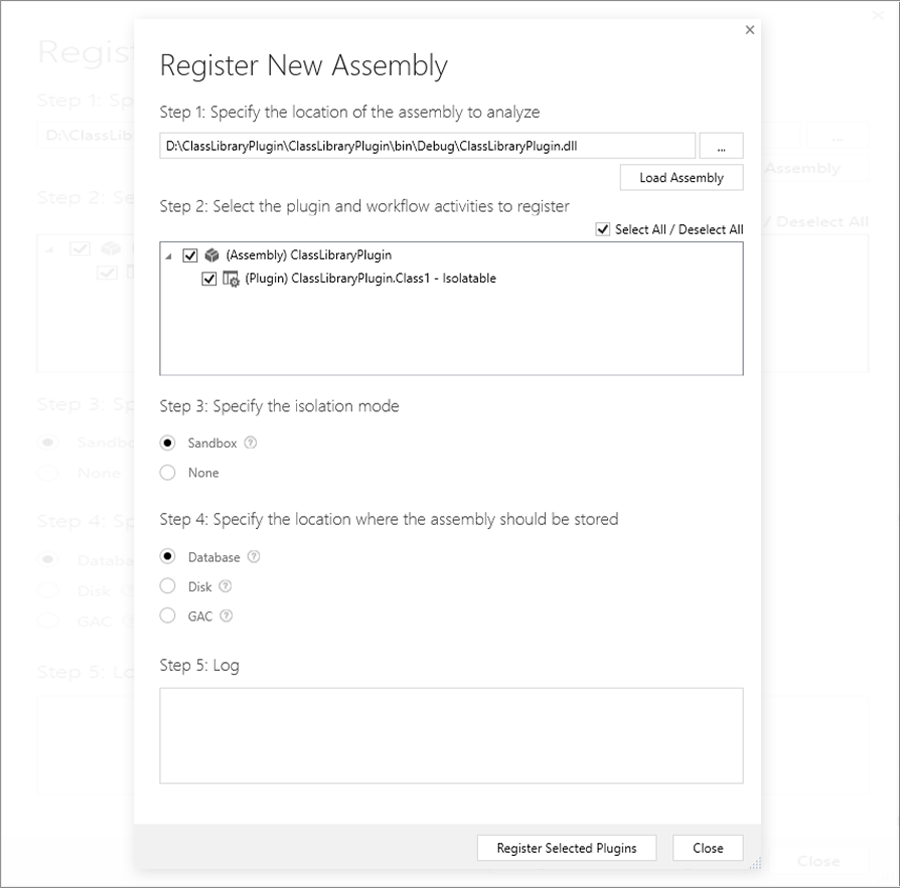
Step 1: First, Register your Assembly
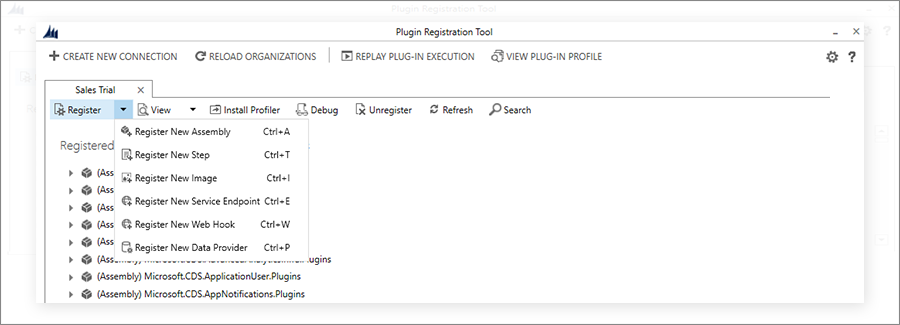
Step 2: Choose the new Register New Data Provider Option.
Step 3: We are creating a new solution here, so add details.
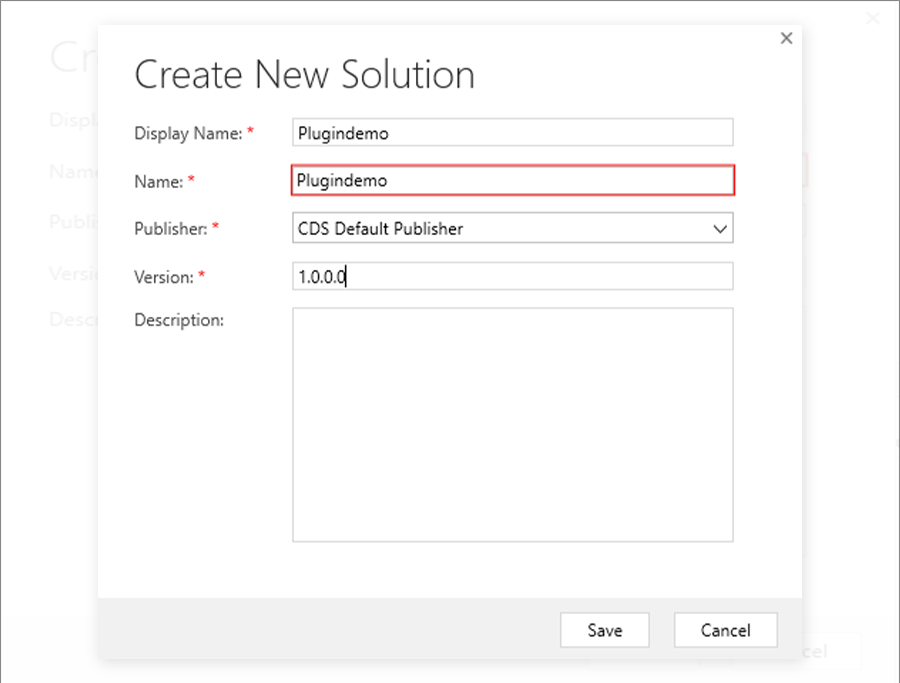
Step 4: Then Click on the Save button. It will open the dialog box to Create a new data source.
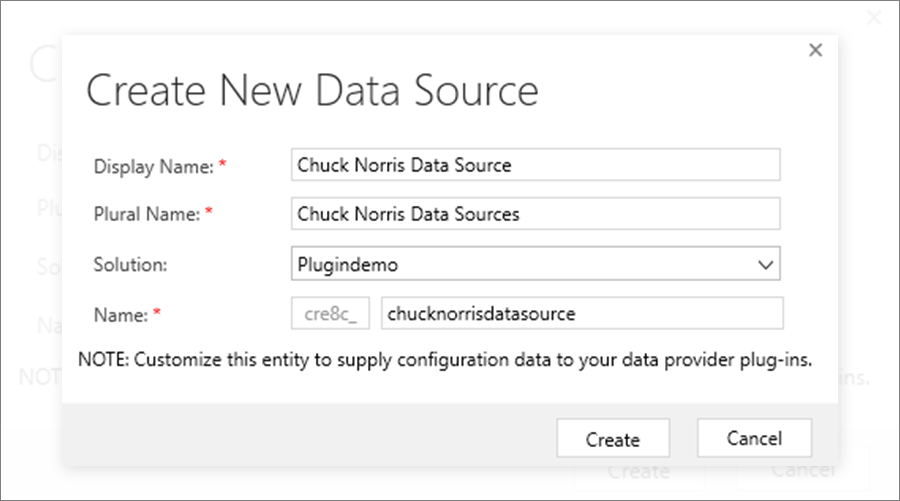
Step 5: Add the display name and plural name for the data source. And select the Solution in which you want to create a new data source.
After filling required details, click on the Create button. It will open a pop-up to register a new data provider.
Step 6: Choose your plug-in assembly & set the Retrieve/RetrieveMultiple handlers you’ve created.
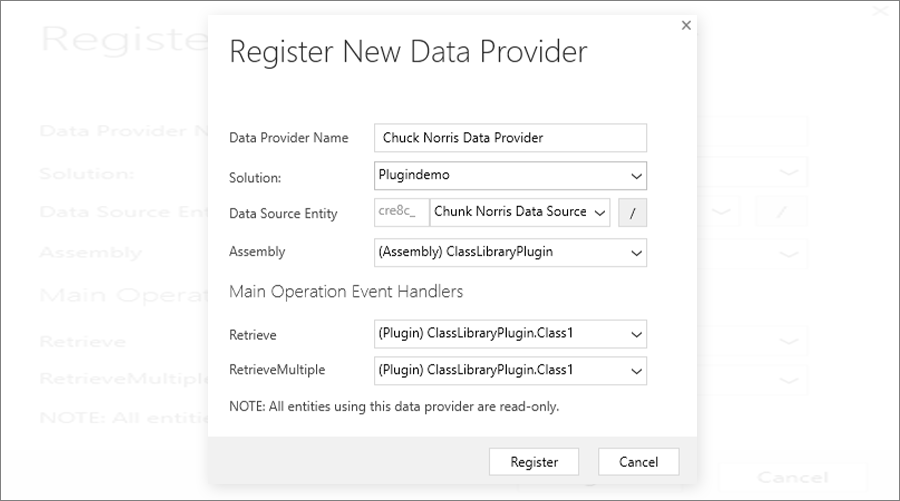
Registration complete.
After registering, the data provider goes to the CRM.
Step 7: In D365, Under Administration -> Virtual Entity Data Source-> New, Choose the Data Provider.

Step 8: Now Create a New Virtual Entity in the Solution.
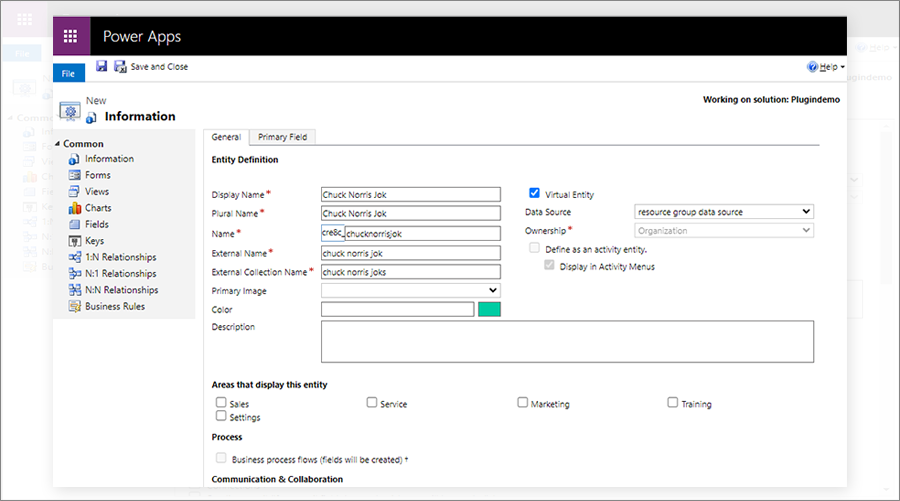
Add the new Data Source and assembly to your solution (optional).
Step 9: Create a new Virtual Entity and check the checkbox in the virtual entity. Select the Data Source.
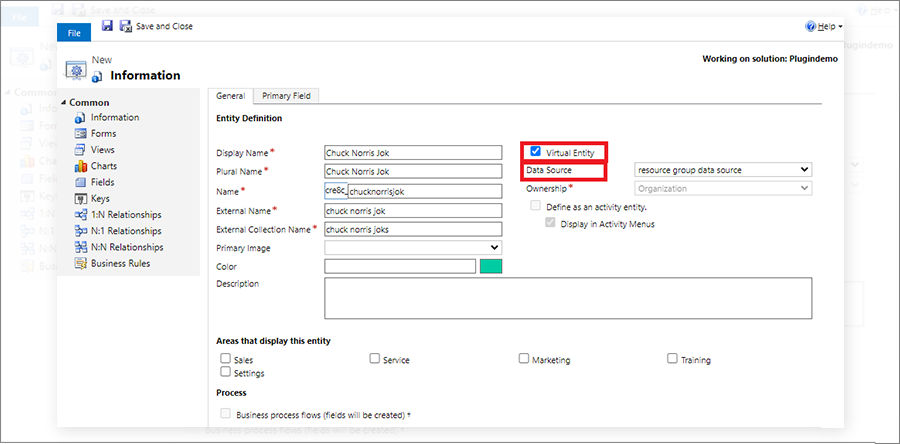
Step 10: Click On Save.
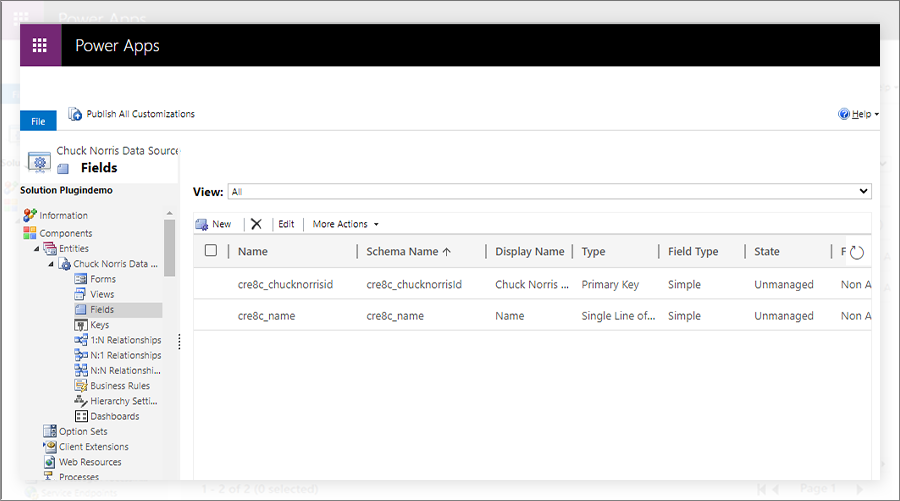
Step 11: Publish All Customizations.
All product and company names are trademarks™, registered® or copyright© trademarks of their respective holders. Use of them does not imply any affiliation with or endorsement by them.


